

Welcome to the Exide Battery Charger user manual. This guide provides essential information for safe and effective use. Always follow safety guidelines to ensure optimal performance and longevity; Understand the key features and benefits to maximize your experience.
1.1 Key Features and Benefits
The Exide Battery Charger is designed to deliver efficient and reliable charging for your batteries. Key features include automatic charging modes, multi-stage charging, and compatibility with various battery types. It offers advanced safety protections like overcharge prevention and short-circuit protection. The charger also provides a user-friendly interface for easy operation. Benefits include extended battery life, optimal charging performance, and reduced maintenance needs. Its compact design and lightweight construction make it portable and convenient for use in different settings. With these features, the Exide Battery Charger ensures a safe, efficient, and durable charging experience for all your battery-powered applications.
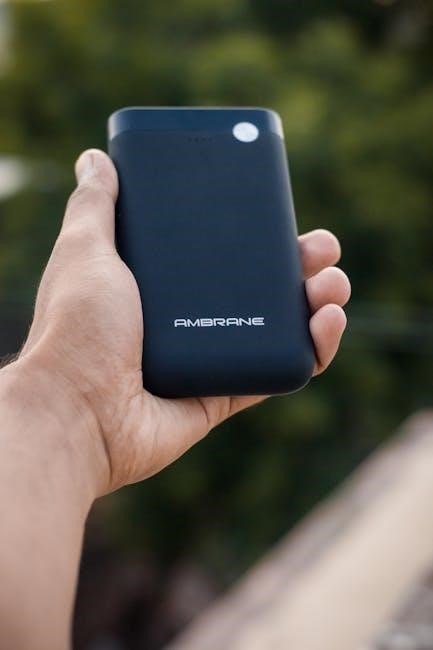
1.2 Product Overview
The Exide Battery Charger is a versatile and efficient charging solution designed for various battery types, including lead-acid and AGM batteries. It is engineered to provide reliable performance, ensuring your batteries are charged safely and effectively. The charger is suitable for both home and industrial use, offering compatibility with a wide range of applications. Its robust design ensures durability, while its user-friendly interface simplifies the charging process. Whether for automotive, marine, or traction batteries, the Exide Battery Charger is a dependable tool for maintaining battery health. This product is designed to meet the needs of users seeking a high-quality, long-lasting charging solution.
Safety Precautions
Always read the manual thoroughly before use. Follow all safety guidelines to avoid injury or damage. Ensure proper connections and usage to prevent hazards. Keep the manual nearby for reference.
2.1 General Safety Guidelines
Always follow these guidelines to ensure safe operation. Read the manual thoroughly before using the charger. Ensure proper ventilation in the charging area to prevent hydrogen gas buildup. Avoid using incorrect chargers, as this can damage the battery or cause hazards. Never overload the charger or connect it to unsuitable batteries. Keep the area clear of sparks, open flames, or hot surfaces. Use protective gear like gloves and goggles when handling batteries. Ensure all connections are secure and free from corrosion. Follow the recommended charging times and voltages to prevent overcharging. Keep children and unauthorized persons away from the charging setup. Regularly inspect the charger and battery for signs of damage or wear.
2.2 Charger and Battery Warnings
Adhere to these warnings to prevent potential hazards. Never use an incorrect charger, as it may damage the battery or cause safety risks. Avoid overcharging, as it can lead to battery degradation or thermal runaway. Keep the charger away from water or moist environments to prevent electrical shock. Do not modify the charger or battery, as this voids the warranty and increases risk of malfunction. Always ensure the charger is compatible with your battery type, especially for specialized batteries like AGM or VRLA. Never charge a damaged or leaking battery, as it may release harmful gases or cause explosions. Always refer to the manual for specific warnings related to your charger model.
2.3 Safe Handling Practices
- Always wear protective gear, including gloves and safety goggles, when handling batteries and chargers to prevent injury from acid spills or electrical arcs.
- Ensure the work area is well-ventilated to avoid inhaling harmful fumes emitted during charging or battery maintenance.
- Never touch both terminals of the battery with bare hands, as this can cause short circuits or electrical shock.
- Keep the charger and battery away from open flames or sparks, as hydrogen gas produced during charging is highly flammable.
- Lift batteries correctly to avoid straining and potential acid leakage; use handles if available.
- Store batteries in a cool, dry place, away from metal objects that could cause accidental short circuits;
- Avoid stacking multiple batteries or chargers without proper support to prevent damage or instability.
2.4 Emergency Procedures
In case of an emergency, such as a battery explosion, acid spill, or electrical fire, follow these steps:
- Evacuate the area immediately and ensure proper ventilation to prevent inhaling toxic fumes.
- Use a fire extinguisher rated for electrical or chemical fires; never use water on battery fires.
- Neutralize acid spills with baking soda or an approved neutralizing agent; wear protective gear to avoid skin contact.
- Disconnect the charger and battery from the power source if safe to do so.
- Seek medical attention immediately if acid exposure or electrical shock occurs.
- Contact a professional for cleanup and repair to ensure safety and prevent further incidents.

Installation and Setup
Unpack the charger and accessories, ensuring all components are included. Place the charger in a well-ventilated area, away from flammable materials. Connect the charger to the battery as per the manual and perform initial checks to ensure proper function.
3.1 Preparing the Charger
Before using the Exide Battery Charger, carefully unpack and inspect it for any damage. Ensure all components, such as cables and clamps, are included. Place the charger in a well-ventilated area, away from flammable materials. Check the power supply requirements to ensure compatibility with your electrical system. Read the manual thoroughly to understand the charger’s features and settings. Familiarize yourself with the control panel and safety features. Perform a quick test of the charger without connecting it to the battery to ensure it powers on and functions correctly. This preparation ensures safe and efficient charging of your battery.
3.2 Connecting the Charger to the Battery
Ensure the charger is turned off before connecting it to the battery; Locate the positive (+) and negative (-) terminals on the battery. Attach the red clamp of the charger to the positive terminal and the black clamp to the negative terminal. Avoid touching the clamps to any metal parts to prevent short circuits. Double-check that the connections are secure and not loose. If the battery has a vent cap, ensure it is properly closed to prevent acid spills. Never reverse the polarity, as this can cause permanent damage to the charger or battery. Once connected, turn on the charger and verify the charging indicators light up. Always follow the manual for specific connection guidelines;
3.3 Initial Setup Instructions
Begin by unpacking the charger and inspecting for any damage. Place the charger on a flat, stable surface away from direct sunlight and moisture. Ensure the area is well-ventilated. Plug in the charger and familiarize yourself with the control panel and indicators. Before connecting to the battery, ensure the charger is set to the correct voltage and charge mode for your specific battery type. Refer to the manual to select the appropriate settings. Turn on the charger and verify that all indicators function properly. Always follow the safety guidelines provided in the manual to prevent accidents. Once everything is set up correctly, proceed to connect the charger to the battery as outlined in the previous section.
Operating the Charger
Select the appropriate charging mode and voltage for your battery type. Always follow safety guidelines and monitor charging progress to ensure safe and efficient operation.
4.1 Starting the Charging Process
To begin charging, ensure the charger is properly connected to the battery. Verify that the charger is set to the correct voltage and mode for your battery type. Always refer to the user manual for specific settings. Turn on the charger and monitor the charging progress. The charger may display indicators such as LED lights or digital readings to show the charging status. Ensure the area is well-ventilated and avoid overcharging, as this can damage the battery. Follow all safety guidelines to prevent accidents. If unsure, consult the manual or contact customer support for assistance.
4.2 Automatic vs. Manual Charging Modes
The Exide Battery Charger offers both automatic and manual charging modes. The automatic mode is ideal for most users, as it adjusts charging settings based on the battery type and capacity, ensuring safe and efficient charging. This mode minimizes the risk of overcharging and prolongs battery life. The manual mode allows advanced users to customize settings, such as voltage and current, for specific charging needs. However, manual mode requires careful monitoring to avoid overcharging or damage. Always refer to the user manual for guidance on selecting the appropriate mode for your battery. Choose the mode that best suits your expertise and charging requirements for optimal results.
4.3 Monitoring the Charging Progress
Monitoring the charging progress is crucial for ensuring safe and efficient battery charging. The Exide Battery Charger features an LCD display that provides real-time updates on charging status, voltage, and current. Users can track the battery’s state of charge and estimated completion time. The charger also includes LED indicators that show active charging, completion, or error states. For added convenience, some models offer audible alerts when charging is complete or if an issue is detected. Regularly check the display and indicators to ensure the process is proceeding smoothly. Always refer to the user manual for guidance on interpreting the data and addressing any alerts promptly. Proper monitoring ensures optimal charging and extends battery life.

Maintenance and Care
Regular maintenance ensures optimal performance. Clean the charger, inspect connections, and store it properly. Follow guidelines for longevity and safety to maintain efficiency and reliability always.
5.1 Cleaning the Charger
Cleaning the Exide Battery Charger is essential for maintaining its efficiency and longevity. Always unplug the charger from the power source before cleaning. Use a soft, dry cloth to wipe down the exterior, removing any dust or debris. Avoid using harsh chemicals, abrasive materials, or liquid cleaners, as they may damage the surface or internal components. For tougher stains, slightly dampen the cloth with water, but ensure no moisture enters the charger. Regular cleaning prevents corrosion and ensures proper heat dissipation. Allow the charger to dry completely before reconnecting it to the power supply. This routine maintenance helps preserve performance and safety standards.
5.2 Checking and Maintaining Connections
Regularly inspect the charger’s terminals, cables, and clamps for damage, corrosion, or wear. Clean any corrosion using a wire brush and apply a light coat of petroleum jelly to prevent future corrosion. Ensure all connections are secure and not loose, as this can cause charging inefficiencies or safety hazards. Always disconnect the charger from both the power source and the battery before performing any maintenance. Wear protective gloves when handling electrical components. Avoid over-tightening connections, as this may damage the terminals. Schedule regular inspections to maintain optimal performance and reliability. Properly maintained connections ensure safe and efficient charging operations.
5.3 Storage Recommendations
Store the Exide Battery Charger in a cool, dry, and well-ventilated area away from direct sunlight and moisture. Avoid exposing the charger to extreme temperatures or humidity, as this may damage internal components. When not in use, disconnect the charger from both the power source and the battery, and store it in its original packaging or a protective case. Ensure the charger is clean and free from corrosion before storage; Avoid stacking heavy objects on top of the charger. Regularly inspect the charger for damage before and after storage. Proper storage ensures the charger remains in optimal condition for future use and maintains its durability.
Troubleshooting Common Issues
Identify common problems like error codes, charging issues, or overheating. Refer to the manual for solutions. Always follow safety guidelines when troubleshooting to avoid further damage.
6.1 Identifying Common Problems
Common issues with the Exide Battery Charger include error codes, the charger not turning on, or irregular charging patterns. Check for loose connections or damaged cables. Overheating is another concern; ensure proper ventilation. If the charger fails to charge, verify the input voltage and battery compatibility. Refer to the troubleshooting guide for detailed solutions. Always consult the manual for specific error code meanings. Addressing these issues promptly prevents further damage and ensures reliable performance. Never ignore warning signs, as they indicate potential malfunctions. Regular maintenance can help minimize these problems and extend the charger’s lifespan.
6.2 Understanding Error Codes
The Exide Battery Charger displays specific error codes to indicate malfunctions. Codes like “E01” or “E02” signal issues such as faulty connections or overheating. Refer to the manual for code meanings. If an error occurs, disconnect the charger and battery, then restart. Ensure all cables are secure and the environment is cool. Some codes may require professional assistance. Always address errors promptly to prevent damage. Regularly check connections and maintain proper ventilation to minimize issues. For persistent problems, consult the troubleshooting section or contact customer support. Understanding these codes helps in resolving issues efficiently and safely.

Technical Specifications
The Exide Battery Charger operates at an input voltage of 220-240 VAC and delivers a 13.7 V DC output. It supports 12V lead-acid batteries with a charging current of up to 2 A, ensuring efficient and safe charging.
7.1 Detailed Product Specifications
The Exide Battery Charger is designed for optimal performance with 12V lead-acid batteries, supporting capacities from 1 Ah to 300 Ah. It features an input voltage of 220-240 VAC and an output voltage of 13.7 V DC, with a maximum charging current of 2 A. The charger includes advanced safety features such as overcharge protection, short-circuit prevention, and thermal monitoring. It also offers a constant power supply mode for continuous operation and a spare cable for convenience. Compatible with both AGM and VRLA batteries, this charger ensures efficient charging while maintaining battery health. Refer to the manual for specific model details and configurations.

Warranty and Support Information
The Exide Battery Charger is backed by a 12-month warranty and dedicated customer support. For inquiries, contact Exide customer service via phone, email, or visit their official website.
8.1 Warranty Details
Your Exide Battery Charger is protected by a 12-month limited warranty starting from the date of purchase. This warranty covers defects in materials and workmanship under normal use conditions. Exide Technologies ensures that all products are free from manufacturing defects and will repair or replace the charger if any issues arise within the warranty period. To maintain warranty validity, ensure the product is used as per the For any inquiries or assistance with your Exide Battery Charger, contact our dedicated customer support team. You can reach us via phone at 1-800-EXIDE-4U (1-800-394-3384) or email at support@exide.com. Our team is available Monday through Friday, 8:00 AM to 5:00 PM EST. For urgent issues, please visit our website at www.exide.com/support for live chat options. Regional offices are also available to assist; contact information can be found on the Exide website. Ensure to have your product serial number and purchase details ready for faster service. Exide Technologies is committed to providing prompt and reliable support to ensure your satisfaction and product performance.8.2 Customer Support Contacts