
The Kenmore Dryer Model 110 repair manual is a comprehensive guide for troubleshooting and fixing issues. It includes wiring diagrams, parts lists, and step-by-step repair instructions. Available as a PDF, this manual ensures DIY repairs are safe and efficient. Access it through Sears Parts Direct or trusted appliance repair websites for optimal results;
Overview of the Kenmore 110 Dryer Model
The Kenmore 110 dryer model is a reliable and efficient appliance designed for household use. It is part of the Kenmore Series 400, known for its durability and performance. Available in both electric and gas configurations, this model offers versatile options to suit different user preferences. The dryer features advanced moisture sensors, a spacious drum capacity, and multiple heat settings for optimal drying results. Its compact design makes it suitable for various laundry spaces. The model number and serial number are crucial for identifying the correct repair manual, ensuring accurate troubleshooting and maintenance. These details are typically located on the dryer’s rear or bottom panel.
Importance of Having a Repair Manual
A repair manual for the Kenmore 110 dryer model is essential for effective troubleshooting and maintenance. It provides detailed guidance on identifying and resolving common issues, ensuring repairs are done safely and correctly. The manual includes wiring diagrams, parts lists, and step-by-step instructions, empowering users to handle DIY fixes confidently. It also helps in understanding the dryer’s components and functionality, which is crucial for preventing future breakdowns. By having the manual, users can avoid costly professional services and extend the appliance’s lifespan. Additionally, it serves as a valuable resource for routine maintenance, ensuring optimal performance and efficiency over time.
Where to Find the Kenmore 110 Repair Manual PDF
The Kenmore 110 repair manual PDF can be easily accessed online through various trusted sources. Sears Parts Direct offers downloadable manuals specifically for Kenmore appliances, ensuring authenticity and relevance. Additionally, websites like ManualsLib and ManualsOnline provide free access to user manuals and repair guides for the Kenmore 110 dryer model. Official Kenmore websites and authorized retailers also offer these resources. For convenience, enter the model number in the search bar on these platforms to quickly locate the manual. These resources are ideal for DIY enthusiasts and professionals alike, offering detailed instructions and diagrams to facilitate repairs and maintenance effectively.
Understanding the Kenmore 110 Dryer Model
The Kenmore 110 dryer model is known for its efficiency and reliability. It features advanced drying technology and durable design. The repair manual provides detailed specifications and maintenance tips.
Key Features and Specifications
The Kenmore 110 dryer model boasts a range of features, including multiple heat settings, an automatic dryness sensor, and a spacious interior capacity. It is available in both electric and gas versions, catering to different household preferences. The model is designed with energy efficiency in mind, ensuring lower utility bills without compromising performance. The robust construction and user-friendly interface make it a popular choice for many consumers. The repair manual provides detailed specifications, including dimensions, electrical requirements, and component diagrams, making it easier for users to diagnose and repair issues effectively.
Model Variants and Series Overview
The Kenmore 110 dryer model is available in various series, including the Elite Oasis and Sensor Smart series, each offering unique features. The Elite Oasis series is known for its advanced moisture-sensing technology, while the Sensor Smart series includes intelligent sensors for optimal drying. The model also comes in different capacities, such as 7.0 cu. Ft. and 7.5 cu. Ft., catering to varying household needs. Additionally, the 110 model is available in both electric and gas configurations, providing flexibility for different energy preferences. The repair manual covers all these variants, ensuring comprehensive guidance for troubleshooting and maintenance. Always refer to the specific model number for precise repair instructions.
Locating the Model and Serial Number
To identify your Kenmore 110 dryer model, locate the model and serial number plate, typically found on the back, bottom, or inside the door. This plate contains essential information for repairs and maintenance. Record these details in the designated section of your repair manual for easy reference. The model number often starts with “110” and may include additional digits, such as “110.86863100” or “110.60912990.” Accurate identification ensures you access the correct repair instructions and parts. Always verify these numbers when downloading or purchasing a repair manual to guarantee compatibility with your specific dryer model.
Contents of the Kenmore 110 Repair Manual
The Kenmore 110 repair manual includes general operating instructions, troubleshooting guides, wiring diagrams, and detailed repair procedures. It also lists required parts and tools for maintenance, ensuring effective DIY repairs and proper appliance functionality.
General Operating Instructions
The Kenmore 110 repair manual provides clear operating instructions, ensuring safe and efficient use of your dryer. It outlines proper installation, loading capacities, and cycle selections. Additionally, the manual covers essential safety precautions, such as venting requirements and electrical connections. Detailed diagrams illustrate component locations, aiding in routine checks. Maintenance tips are included to prevent common issues, while troubleshooting sections help diagnose and resolve problems quickly. This section is crucial for users to maximize their dryer’s performance and longevity, ensuring optimal functionality and safety throughout its lifespan.
Troubleshooting Common Issues
The Kenmore 110 repair manual includes a dedicated section for troubleshooting common issues, such as the dryer not heating, failing to start, or producing excessive noise. It provides detailed symptom-to-solution guides, helping users identify root causes like faulty heating elements, broken belts, or clogged vents. Error codes are explained, along with step-by-step solutions. The manual also addresses issues related to poor drying performance, ensuring users can diagnose and resolve problems efficiently. By following the troubleshooting guide, users can restore their dryer’s functionality without professional assistance, saving time and money. This section is essential for maintaining the appliance’s performance and addressing unexpected malfunctions effectively.
Wiring Diagrams and Component Access
The Kenmore 110 repair manual includes detailed wiring diagrams that illustrate the electrical connections and components of the dryer. These diagrams are essential for identifying and diagnosing issues related to the dryer’s circuitry. The manual also provides clear instructions on how to access internal components, such as the heating element, thermostat, and motor, ensuring safe and efficient repairs. By referencing these diagrams, users can locate parts quickly and understand how they interact within the system. This section is particularly useful for advanced DIY repairs, offering a visual guide to help users navigate complex electrical and mechanical systems with confidence and precision.
Parts and Tools Required for Repairs
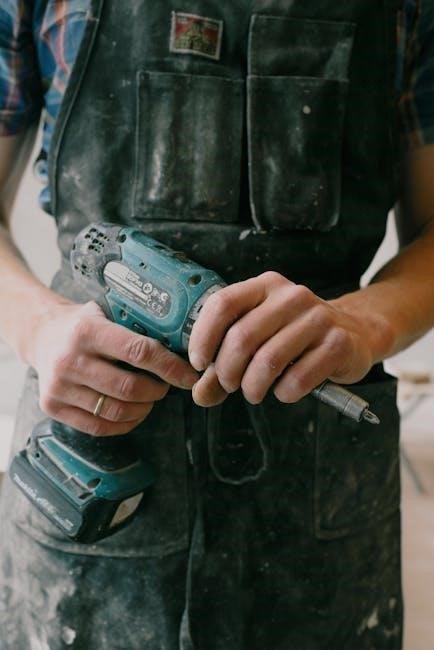
The Kenmore 110 repair manual provides a detailed list of tools and parts needed for various repairs. Essential tools include screwdrivers, wrenches, and pliers, while specific parts like belts, heating elements, and sensors may be required. The manual lists compatible replacement parts, ensuring repairs are done safely and effectively. Users can source these parts from Sears Parts Direct or authorized suppliers. This section helps users prepare for repairs by identifying the necessary items, saving time and reducing the risk of errors. Having the right tools and parts on hand ensures that repairs are completed efficiently and correctly, maintaining the dryer’s performance and longevity.
Safety Precautions and Guidelines
Always disconnect power before repairs. Use protective gear and ensure proper ventilation. Follow the manual’s guidelines to avoid injuries and liability. Safety is paramount for successful DIY repairs.
Essential Safety Tips for DIY Repairs
When performing DIY repairs on your Kenmore 110 dryer, always prioritize safety. Disconnect the power supply before starting any work to avoid electrical shocks; Wear protective gear, including gloves and safety glasses, to prevent injuries. Ensure proper ventilation in your workspace to avoid inhaling dust or fumes. Follow the repair manual’s guidelines strictly, and never bypass safety features. Keep loose clothing and long hair tied back to avoid accidents. Use appropriate tools and avoid overloading circuits. If unsure about a step, consult a professional. Remember, safety precautions are crucial to prevent injuries and ensure successful repairs.
Understanding Warranty and Liability
Understanding warranty and liability is crucial before initiating DIY repairs on your Kenmore 110 dryer. The repair manual PDF typically outlines warranty terms, including coverage periods and conditions. Unauthorized repairs may void your warranty, so ensure all modifications align with manufacturer guidelines. Liability for damages or injuries resulting from improper repairs rests solely with the user. Always follow the manual’s instructions to avoid legal or financial repercussions. If unsure about a procedure, consulting a professional is advisable to maintain warranty validity and ensure safety. This section emphasizes the importance of adhering to manufacturer recommendations to protect both your appliance and yourself.
Preparing Your Workspace for Repairs
Preparing your workspace is essential for safe and efficient repairs. Ensure the area is well-lit, clear of clutter, and protected from dust. Lay down a durable work surface or mat to prevent damage to components. Wear protective gear, such as gloves and safety glasses, to minimize risks. Gather all necessary tools, as listed in the Kenmore 110 repair manual, including screwdrivers, pliers, and wrenches. Keep the PDF manual readily accessible for reference. Proper ventilation is also crucial, especially when handling electrical or gas components. A well-prepared workspace reduces errors and ensures a smoother repair process;
Before starting, consult the manual for specific tools required for your repair. This helps avoid delays and ensures you have everything needed. A organized workspace also helps prevent misplacement of small parts, which is common in DIY repairs. Always refer to the Kenmore 110 manual for guidance on workspace setup and safety precautions.
Troubleshooting Your Kenmore 110 Dryer
Troubleshooting your Kenmore 110 dryer involves identifying common issues like no heat or noise. Use the manual’s guides to diagnose error codes and electrical/mechanical faults effectively.
Common Problems and Solutions
The Kenmore 110 dryer repair manual outlines common issues and their fixes. One prevalent problem is the dryer not heating, often due to a faulty heating element or thermal fuse. Strange noises, such as grinding or thudding, may indicate worn drum rollers or a loose drum belt. Another issue is poor drying performance, which could result from clogged vents or malfunctioning moisture sensors. The manual provides step-by-step solutions, such as replacing the heating element, realigning the belt, or cleaning the vent system. Additionally, error codes are explained, guiding users to specific fixes. Regular maintenance, like cleaning the lint filter, can prevent many of these issues, ensuring optimal performance and longevity.
Identifying Error Codes and Alarms
The Kenmore 110 dryer repair manual helps users identify and resolve error codes. Common codes include E1 (temperature control issue), E2 (moisture sensor malfunction), and E3 (heating element failure). Each code is accompanied by detailed explanations and troubleshooting steps. For example, E1 may indicate a faulty thermistor, while E2 could signal a blocked moisture sensor. The manual provides step-by-step instructions to diagnose and repair these issues, such as checking sensor connections or replacing defective components. Understanding these codes ensures timely repairs, preventing further damage and ensuring optimal dryer performance. The manual’s clear guidance helps users address errors efficiently and safely.
Diagnosing Electrical and Mechanical Issues
The Kenmore 110 repair manual provides detailed guidance for diagnosing electrical and mechanical problems. It includes wiring diagrams to help trace issues in the dryer’s circuitry. Common electrical issues include faulty thermostats, broken heating elements, or malfunctioning sensors. Mechanical problems often involve the drum belt, rollers, or motor. The manual offers step-by-step instructions for testing components and identifying worn or damaged parts. For example, if the dryer won’t start, the manual suggests checking the door switch, thermal fuse, or power supply. Similarly, unusual noises may indicate a worn drum belt or misaligned rollers. This section empowers users to pinpoint issues accurately and perform necessary repairs confidently.
Step-by-Step Repair Guide
This section provides a detailed, sequential approach to repairing the Kenmore 110 dryer. It covers disassembling, replacing parts like the heating element, and reassembling safely. Follow the visual guides and instructions to ensure proper repairs and restore functionality efficiently.
Disassembling the Dryer Safely
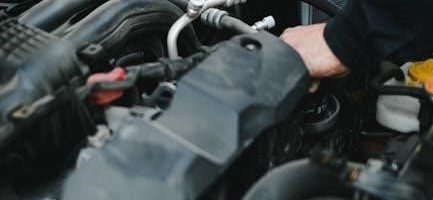
Start by disconnecting the power and gas supply to ensure safety. Remove the lint filter and take out the screws securing the top panel. Gently pry the top open using a screwdriver. Next, disconnect the wiring harness and remove the front panel screws. Carefully lift the drum and set it aside. Use a Torx screwdriver to remove the drum rollers and belt. For the heating element, disconnect the electrical connections and remove the mounting screws. Use clamps to secure loose wires during disassembly. Follow the PDF manual for specific diagrams and instructions to avoid damaging components. Always wear protective gloves and work in a well-ventilated area.
Replacing the Heating Element
Begin by unplugging the dryer and turning off the gas supply for safety. Remove the back panel using a screwdriver to access the heating element. Disconnect the electrical connectors carefully. Remove the screws or brackets securing the old heating element and replace it with the new one, ensuring proper alignment. Reconnect the electrical connectors securely to prevent short circuits. Replace the back panel and test the dryer to ensure the heating element is functioning correctly; Always follow the PDF manual for specific instructions and safety guidelines.
Fixing the Drum Belt and Rollers
Inspect the drum belt for cracks or wear and tear. If damaged, replace it by removing the top panel and front access to reach the drum. Loosen the belt tensioner and slide off the old belt. Install the new belt, ensuring it aligns with the pulleys. For rollers, remove any debris and lubricate if necessary. If rollers are worn out, replace them by taking out the retaining clips and swapping them with new ones. Refer to the PDF manual for detailed diagrams and step-by-step instructions. Properly securing the belt and rollers ensures smooth drum rotation and prevents further damage.
Replacing the Belt
To replace the drum belt on your Kenmore Model 110 dryer, start by unplugging the appliance for safety. Remove the top panel and front access to reach the drum area. Locate the belt tensioner and loosen it to release the old belt. Carefully pull the belt off the pulleys and discard it. Install the new belt, ensuring it aligns properly with the pulleys and tensioner. Tighten the tensioner to secure the belt in place. Refer to the PDF manual for specific diagrams and alignment guides. Proper belt installation ensures smooth drum rotation and prevents noise or imbalance during operation.
Realigning or Replacing Rollers
Realigning or replacing the drum rollers in your Kenmore Model 110 dryer is essential for smooth operation. Start by disconnecting power and removing the drum. Inspect each roller for wear or damage. If misaligned, adjust the roller axles to ensure proper positioning. For damaged rollers, remove the retaining clips and replace with new ones. Use the PDF manual to locate roller positions and torque specifications. Ensure all rollers are securely fastened to prevent vibration and noise. Regular maintenance of rollers prolongs dryer lifespan and maintains performance. Always follow safety guidelines when handling electrical components during repairs.

Maintenance Tips for Longevity
Regular cleaning of the lint filter improves airflow and efficiency. Check moisture sensors for accuracy and replace if faulty. Inspect electrical connections annually to ensure safety and proper function.
Cleaning the Lint Filter and Vent
Cleaning the lint filter after each use prevents buildup and reduces fire risks. Use a soft brush or vacuum to remove lint. For the vent, detach it from the dryer and outside vent. Use a flexible brush or vacuum hose to clear blockages. Ensure all connections are secure after reassembly. Regular cleaning improves airflow, reduces drying time, and enhances efficiency. Neglecting this maintenance can lead to increased energy bills and potential hazards. Refer to your Kenmore Model 110 manual for detailed instructions and safety guidelines to ensure proper cleaning techniques.
Checking and Replacing the Moisture Sensors
Moisture sensors in your Kenmore dryer detect dampness to optimize drying cycles. If malfunctioning, clothes may not dry properly. To check, unplug the dryer and locate the sensors, usually near the drum. Clean any lint or debris with a soft brush. If damaged, refer to your repair manual for replacement instructions. Use genuine Kenmore parts for reliability. Reassemble carefully and test the dryer to ensure accurate moisture detection. Regular maintenance ensures efficient performance and prevents over-drying or under-drying clothes. Follow the manual’s guidelines for safe and effective sensor replacement to maintain your dryer’s optimal functionality and extend its lifespan.
Regular Inspection of Electrical Connections
Regularly inspecting the electrical connections in your Kenmore dryer is crucial for safety and efficiency. Start by disconnecting the power supply before accessing internal components. Check all wiring for signs of wear, fraying, or damage. Clean terminals and connectors to ensure proper conductivity. Verify that all connections are secure and not loose. Refer to your repair manual for specific guidance on identifying and replacing faulty wires or connectors. This preventive maintenance helps avoid unexpected malfunctions and ensures reliable operation. By addressing electrical issues early, you can prevent more severe problems and extend the lifespan of your dryer. Always follow the manual’s safety guidelines during inspections.

Additional Resources and Support
Additional resources for Kenmore dryer repair include Sears Parts Direct for manuals and parts. Visit ManualsLib or online forums for further assistance and troubleshooting. Contact Kenmore support for professional help.
Online Forums and DIY Communities
Online forums and DIY communities are invaluable for troubleshooting and repairing your Kenmore dryer. Websites like ManualsLib and Sears Parts Direct offer free access to repair manuals and part diagrams. These platforms allow you to connect with experienced technicians and homeowners who share tips and solutions for common issues. Additionally, forums dedicated to appliance repair provide step-by-step guides and video tutorials, empowering you to tackle repairs confidently. Engaging with these communities can save time and money, ensuring your dryer runs efficiently without professional intervention. Utilize these resources to enhance your DIY repair skills and maintain your Kenmore dryer effectively.
Authorized Service Centers and Professionals
For complex repairs, consulting authorized service centers or professionals is recommended. Kenmore-authorized technicians have extensive training and access to genuine parts, ensuring reliable fixes. Sears Service Centers and Kenmore’s official network provide expertise tailored to your dryer model. They offer comprehensive diagnostic services and warranties on repairs. Using authorized professionals guarantees compliance with manufacturer standards, preserving your appliance’s longevity. To find a certified technician, visit Kenmore’s official website or contact their customer support. This option is ideal for intricate issues beyond basic DIY solutions, ensuring safe and efficient repairs that maintain your dryer’s performance and warranty coverage.
Parts Suppliers and Retailers
For Kenmore dryer repairs, reliable parts suppliers and retailers are essential. Sears Parts Direct offers a wide range of genuine Kenmore parts, ensuring compatibility and quality. Online retailers like Amazon and eBay also provide various components, often with customer reviews to guide your choice. Specialized appliance stores and local hardware shops can be valuable resources for specific parts. When purchasing, ensure to use your dryer’s exact model number to guarantee correct fitment. This approach avoids costly mismatches and ensures efficient repairs, extending your dryer’s lifespan with authentic and durable components.
The Kenmore Dryer Model 110 repair manual is a vital resource for efficient troubleshooting and maintenance. Its availability as a PDF ensures easy access to comprehensive repair guidance, making it an essential tool for both professionals and DIY enthusiasts.
Final Thoughts on DIY Repairs
DIY repairs for the Kenmore Dryer Model 110 can be cost-effective and rewarding when guided by the repair manual. The PDF manual provides clear, step-by-step instructions, making it easier for homeowners to troubleshoot and fix common issues. With detailed wiring diagrams and component access information, users can address problems confidently. However, it’s crucial to follow safety precautions and use genuine parts to ensure reliability. Regular maintenance, as outlined in the manual, can prevent future issues and extend the dryer’s lifespan. Embracing DIY repairs not only saves money but also enhances your understanding of appliance mechanics.
Encouragement for Proper Maintenance
Regular maintenance is essential to ensure your Kenmore Dryer Model 110 operates efficiently and lasts longer. By cleaning the lint filter after each use and inspecting venting systems, you can prevent common issues like overheating or poor drying performance. Checking and replacing moisture sensors annually helps maintain optimal drying cycles. Refer to the repair manual for detailed maintenance schedules and procedures. Consistent upkeep not only prevents costly repairs but also enhances safety and energy efficiency. Encourage a routine check of electrical connections and rollers to ensure smooth operation. Proper care will extend the life of your dryer and maintain its performance over time.